Monday, June 23, 2008

Olympia Phantom Update

I just finished a trip with the Olympia Phantom suit. Temps in Yellowstone were 34F in the rain / snow / hail. Temps over Washington's Snoqualmie Pass were in the 38F range and speeds were 70+.

On the other hand, temps in the Texas Panhandle pinged triple digits. Dalhart, TX showed 100F even for several hours on the ambient air gauge of the FJR.

The Phantom and I handled it all quite well, thank you.

Here are a couple of pics in the cold with the liner installed and one layer of common thermal underwear. Heated grips were the only thing I needed to be perfectly comfy. Really, I have no memories of discomfort, cold spots, drafts when I was set up this way. I use thin roadrace gloves with gauntlets. V-Strom hand guards help.


Then came the Texas panhandle. I only used the exterior of the suit and a specially ribbed air moving liner (separate article later). Obviously the stock warming liner was packed away and all the vents were open. It worked. 100F is 100F and staying in the shade of the suit was just fine as long as air kept moving.

So that part of the package worked, but if you read the first review you'll find that the suit is an absolute commitment. You have to put the suit on in the morning and decide which mode it'll be in. You pretty much have to live with that commitment for the rest of the day.

It's impractical to take the liner in or out in the middle of a day. It's impractical to even change the venting on a large scale without pulling over and asking for help. Set it and forget it, because it's just gonna be hard to do.

Just to show an example: There are vents / air intakes in the arm. They extend from the upper shoulder down to a point below the elbow. They're large and they work. No complaint there. But OMG, if you open them and do the velcro that keeps it all from flapping in the breeze, you cannot possibly close the zippers and redo the velcro for a sudden shower or a mountain pass. You must pull over, yank on zippers, tug hard on velcro, and batten the hatches.

I don't even want to discuss the vents on the back. Virtually impossible to secure if the suit is on your body. I don't care if you pull over or not. You'll have to get naked at the side of the road.

This is my only problem with the suit....... It's the most inflexibly flexible thing I own.

Saturday, June 21, 2008

The luggage rack in actual use.

I just finished 4600+ miles over two weeks with the luggage rack. Mind you, there's one mod I made before I left that probably proved to be beneficial. I used aluminum barstock for the front mounts of the prototype version you see two posts below.

For the actual mounts, I switched to 1/8 x 1 steel stock. The one or two ounces of weight I might have saved with aluminum just didn't concern me when compared to the possibility of cracking or crushing of the mounts.

Here are some pics of the plate installed and then in use. I have to guess I had more than 50# on it for the entire trip. The load is mounted forward, very low when compared to using a topcase, and there is very little problem with handling changes. Basically the bike just gets a little more heavy.

Again, this kind of thing can be fabricated for any sort of bike. TW200 to GL1800.


Wednesday, May 14, 2008

Olympia Phantom review


I recently bought an Olympia Phantom from my friend Nathan at MotoLiberty San Antonio (TX). It might seem strange that a guy from Seattle would buy from a store in San Antonio, but service is important to me. MotoLiberty has always delivered at both the Dallas and SA locations. They know their stuff and they're easy to work with.

This past Sunday I took the Phantom on a shakedown ride eastbound from Seattle on I-90 then east on I-82 into Yakima. Temperatures over Snoqualmie Pass were in the 37F range with persistent rain. Temps east of the mountains were about 54F with winds in the 40+ mph range. It was a near perfect day for a test.

The suit consists of a Dupont Cordura outer shell and a removable jump suit liner. I wore a t-shirt, Warmnsafe electric jacket liner, bluejeans and touring boots underneath the lined suit. Without connecting my heated jacket liner, I was perfectly warm even at 37F in the rain..... but I should mention that I was on the FJR with V-Strom hand guards and the windshield all the way up. I guess what I'm saying is that the bike protected the suit and the suit protected me. Dispite riding in the cold rain for at least 2 hours, I never got wet and the only parts of me that started feeling cold were the tips of my thumbs.

There are other reviews of the product out there, but here are my opinions of the design and execution:

1) The suit is promoted as a pull-over that can be donned over your street clothes. This is probably practical if you're not using the liner, but if you use the whole suit, it's a PITA to do.

2) The suit seems very effective as a "put it on in the morning and ride all day" suit.

3) It's a painfully long process to get the suit on and off. The outer shell has a whopping 124 inches (Yes, TEN+ FEET) of 1" wide velcro that has to be seperated (and realigned) before you can get the suit on or off. Mind you, there's 10 feet of zipper underneath the 10 feet of velcro. Oh, and another ten feet of zipper on the liner (but no velcro). So if we do the math, we have ten feet of velcro and twenty feet of zipper. No, I'm not kidding.

4) Olympia made no provision for making electrical connections thru the suit. There is no prescribed way to connect your heated clothes. There are no openings in the liner or outer shell.

5) Unless you peel the top part of the suit down, you can't get anything out of your pants pockets if you need to. I left my wallet in my jeans and had to do some Cirque de Soleil moves to extract it later. Even something as simple as getting two Tums out of my left front pocket required the skills of a specially trained Chinese girl. There is NO access from the outside to the inside of the suit.

So how do I view the suit in the marketplace? I think it's preferable to a set of leathers for LD riding, but I'll keep my cowskins for the crazy stuff. It's more comfy and warmer than my Joe Rocket two piece suit. It supports a wider range of temps than anything else I own. The removable liner and the zippered venting should easily support temps from freezing to 100F without much trouble.

Does it work? Yes, if you accept it for what it is. Is it convenient for short trips? Not even a little bit. Is it a good touring suit for a 700 mile day? At its price point, yes. Street pricing is around $450.

Wednesday, April 9, 2008

Luggage rack prototype

Before you look at these pics and decide they're only about sport-touring motorcycles, think again. What I'll present here could apply to any motorcycle that needs a rack.

I dislike topcases. They're not very aerodynamic. They're cumbersome. They're expensive. They make my FJR look even more geriatric than it might otherwise appear. They're mounted too high and too far back for decent handling at speed.

90% of the time there's nothing in the topcase anyway, but we keep them on our bikes because their mounts are so freaking ugly.

For my purposes, the FJR's sidecases and a piece or two of soft luggage will haul all the stuff I need most of the time. If I need more stuff than that, I need to enlist the assistance of UPS.

So I've been thinking about building this for the last week or so. My design criteria were:

1) Keep my soft luggage from rubbing on my hard luggage.
2) Create a load space that extended from the tail of the FJR to the front of the passenger seating area.
3) Inexpensive but moderately attractive.
4) Easily removable.

And so, I built this.


Total time invested is ~5 hours. Raw cost was ~$40.

The rack is made of 3/8" x 16" x 24" ABS plastic. My local supplier sells it with a mottled finish that helps keep it from looking scratched in real-world use. The supplier even rounded the corners and buffed the edges for me. All I had to do was measure, drill, and fabricate the front aluminum brackets.

So what does this have to do with you and your bike? Well, LOTS of motorcycles out there will support racks. Look up your local plastics dealer. Ask about ABS or Delrin if you want a black rack. HDPE can be used if you want white. Other plastics come in colors. Why use plastic? It's easier to work with and it's 1/4 the cost of aluminum plate.

Just another thing to make you think.

Monday, April 7, 2008

Review - Alpine Stars
Ridge Waterproof Boots


I've been looking for a reasonably priced set of waterproof boots. I really don't like cold/squishy/wrinkled toes at the end of a day's ride. I don't like trying to dry a pair of fungus farms over a hotel room heater unit overnight. I don't like putting semi-dry (cold) boots on first thing in the morning. So, because I live in the Pacific North WET, I got these.

I got a phone call from my friend Suzie inviting me to join her and her GF at one of the local dealerships. Seems they were having their quarterly BBQ and sale. While wandering around, Suzie stumbled on these boots. (We'd coincidentally been looking at them online the previous evening. Suzie had already ordered a set. I was going to order a set that evening.)

I tried them on and they fit correctly in the toe area. They seem fairly true to size and tend to be wider across the toes than most manufacturers' roadrace boots. Construction seems durable. If your feet are like mine with a wide toe area and skinny heels will find they're a bit too wide in back, but they're not unusual in this regard.

Internet price is about $110. Suzie got me these for $87. She made them a gift.

Ok, so now the review in actual use. I only give them 2.5 stars right now.

PROS
1) These boots release from both sides. Getting your foot into them is super easy.
2) They're decent looking.
3) They seem to have a small patch of reflective material on the back of the heel. (Yeah, I'm really reaching for pros.)

CONS
1) The toe height is 2". This makes it difficult to get the toe under the shifter.
2) The boots are stiffer than John Holmes at the peak of his career. This makes it difficult to bend your ankle for shifting. 1+2 equals lots of missed shifts.
3) The shin guard area of the boot is only 8.25 inches above the inside base of the boot. Stand barefooted and measure 8.25 inches up your leg from the floor. Now imagine a REALLY stiff boot whacking you in the shins at that point every time you walk or shift. The 'shoe' part of these boots is comfy (but stiff). The uppers are torture.

I haven't really tested their waterproofness, but based on what I see of the construction, they seem tight. I'll re-review these if I ever get them broken in. I hated my SIDI roadrace boots when I originally bought them too. Time will tell.

Friday, March 28, 2008

Secure / waterproof tank storage.

I'm finally getting around to posting the pics and details of my waterproof tank storage system. We could call it a tankbag, but it's far from a bag.

The unit is made from a Seahorse SE-120 case that's lockable and waterproof. It is mounted on a SW-MOTECH tank top camera mount system.

The whole unit is easily removed and replaced, doesn't interfere with fueling as much as other systems, and is completely waterproof so the contents won't get rusty or soggy.

Not all of the SW-MOTECH parts are used. Unfortunately TwistedThrottle doesn't sell the baseplate and the mount without either a tank bag or the camera kit, so you end up with some parts left over.

Here are the pics. Click to make larger.


Sunday, February 3, 2008

Reflector kit installation

I've just done business with Alex at Realtime Industries. I purchased a reflector kit for the FJR. He custom cuts the kit to fit the hard bags for sport-touring machines. His work and customer service are excellent.

Alex sells kits with additional graphics, and if you look at his products, the kits are available in either red (my choice) or the more popular "black" that reflects white/silver at night when headlights hit it.

Based on the pics below, you can see I chose plain old red. Some of you are going to think it's hideous. Too bold. Too loud. Let me explain my criteria.

In my opinion, these reflector kits are a safety device. They help people see you. Big, bright red reflector kits help people see you both DAY and NIGHT. The "black" kit does nothing for you during the day. For me, this is a disadvantage in Seattle where it's often gloomy, overcast, and generally grey.

My other issue with the "black" kits is that they're not really black. They're sort of a dark dark brown. They look even more brown when mounted on the FJR's dark black sidecases. It's an aesthetic thing. I'd rather have high contrast and high visibility than a poor color match with only night-time visibility advantages.

Again, we're back to personal choice. Here are the pics. As usual, click to make them larger.

Under my regular garage lighting. No flash.


No lighting in my closed garage. Light flash setting.

Wednesday, January 30, 2008

The Luggage Locker Debacle.

A previous article contains some info on the Luggage Locker product. I intended to use their product to create a lockable, relatively secure and waterproof case that would be mounted directly in front of me while riding. To accomplish this, I bought a SeaHorse SE-120 case.

I went to Luggage Locker because theirs is the only tank mounting system I've found with a keyed lock built into the product. I intended to mount the case onto their camera mount plate.

Picture of the concept again. Click to make it larger.


A little history. I bought a used Luggage Locker product from a friend. It was used and inexpensive. The package contained a tank bag, a camera mount kit, and a base plate. The base plate I got was pretty generic and didn't fit my FJR, so I ordered a FJR base plate from Luggage Locker's website. I got confirmation of the order on January 7.

Today is January 30. That's 23 days. Let me tell you what's transpired.

On about January 20th, I emailed Luggage Locker and got the following response:

"I'm headed to the factory either today or tomorrow to pick up a load of bags. Yours should be in that batch,.....". Note: I didn't order a bag. He never looked up my order.

Yesterday, I left a voicemail on his telephone. This morning I got a 2 minute voicemail of excuses. The excuses included:

1) He didn't have a heated workspace.
2) He has about a 6 week period where he can't get product out because of the cold.
3) This is apparently his off season and "most people aren't needing things".
Interesting way to run a business.

Now, he claimed he'd get the product out within the next couple of days, but this was getting ridiculous. It made me wonder seriously about what was supposed to be a relatively simple project.

Then it happened. I went downstairs to re-examine the idea. I looked at the existing mount ring I'd gotten with the used unit. I grabbed the lock with my thumb and forefinger. I pulled and wiggled the lock just once. Nothing difficult, nothing heroic.

The lock came completely out of the mount ring. POIT! No threads, no security pin, no locator of any kind. Apparently it's held in place with some sort of epoxy. The delrin/teflon-esque plastic of the unit doesn't seem compatible with the epoxy. IMO - a less than ideal execution and hardly secure.

Granted, I don't know how old my baseplate is. I don't know how many miles are on it. By the same token, I won't be able to tell when the new one will fail.

I cancelled my order in writing immediately. I cannot recommend the Luggage Locker product or company.

I've elected to use the Twisted Throttle - SW MOTECH baseplate and camera mount sytem instead. I'll figure out how to lock this unit to the FJR and post a new article.

UPDATE re: Twisted Throttle. I ordered the baseplate and camera mount last night online (1/30/08). I've already received UPS confirmation of that the paperwork was done at ~9am PST (1/31/08). Apparently they have inventory and they ship orders.

Notice received that product has shipped at ~2pm PST (1/31/08).

UPS Notice received that product is on time at ~6pm PST (1/31/08). Twisted Throttle seems to work.


2/4/08 - YOU ARE NOT GONNA BELIEVE THIS!
Luggage Locker, aka Rocket Locker, aka Leslie Alderman invoiced and shipped his product to me two days after written cancellation. What kind of business is he running? The product arrived by USPS today with a hand written invoice (off-the-shelf 'statement' stock). Further, the product was wrapped in an old Brooks Brothers bag. This is turning out to be the worst retail transaction I've ever had, and that includes more than 100 eBay transactions.

Yes, I sent him a scathing email. I'll be happy to report how it goes.


Update: Leslie Alderman has emailed me saying he will take care of the problem if I'll send the product back. It gets shipped to him tomorrow (2/6/08) with proof of delivery.

Monday, January 28, 2008

Tank Bags

I have a few tank bags. Here are some examples I've flopped onto the FJR for visuals. None of them is strapped down or attached by magnets. They're just "in position".

If you're asking "strap down" or "magnetic", I'd say magnetic. They're easier to remove, don't leave a baseplate once removed, and don't seem to scratch the tank any more or less than strap downs. Do they move? Believe it or not, the magnetics seem to move less than strap downs.

Some examples, starting with the smallest and moving all the way to insanely large. As usual, you can click on these pics for a larger version.

Marsee Bullet bag. Tiny. Essentials only. Wallet, passport, package of crackers. It doesn't fit much more than that.


Older Chase Harper 100mcm semi-rigid bag. Currently still in production. Small and pretty useful. No handle or grab strap. This one has to be 15+ years old. I guess their products last well enough.


Luggage Locker tank bag. I had to prop it into position with a foam pad underneath. The mount plate has yet to arrive from the manufacturer. Medium sized. Floppy sides and top, rigid base, locking (twist and lock) base system. This is the only tank bag I've found with an actual keyed lock to keep it on the bike.


Cortech/Tourmaster TriBag 21 liter. As you can see, it's taller than the windscreen when full. Not logical. I've also shown this same bag used as a tail bag on the FJR passenger seat. The bag doesn't seem to be in production any more. I'm guessing most people thought it was too big.


And finally, an option I'm working on. This is a waterproof, locking case attached to a locking Luggage Locker baseplate and mount plate. This is not a Pelican case. It's a SeaHorse SE-120 case with keyed locks. The semigloss finish is much more appropriate for this application than a Pelican and you can't get integrated locks on the Pelican. The SE-120 was delivered to my house for less than $35.

FJR - Farkle layout.

I've taken a bunch of pics of the complete control and farkle layout of the FJR. I'm going to reconsolidate them here and clean up one or two of the other articles. This version should be more complete and more visually descriptive. All these pics and ideas are just my way of doing things. They work for me. They're ideas and methods you might want to consider when it comes to making changes to your motorcycle, FJR or not. Here goes.

What comes to my left hand:
The focal point is the stealth garage door opener. It's velcroed to the hand guard and there's a tether from it to a bolt for a little more assurance it won't tumble and can't be removed easily.

Above it is the add-on control box for the cruise control (green and amber push buttons) and the Heat-troller for the heated hand grips. There's also an alarm blinkie. Obviously the bike has modified Suzuki V-Strom hand guards. (Common mod for FJRs).


The total installed package:
This is the usual configuration of farkles. Cell phone, Quest 2 GPS, iPod Shuffle, Boostaroo amp (helps extend the battery life of the iPod), and a set of custom moulded headphones (not in pic). Obviously the music stuff can be stuck in a my jacket pocket. I seldom use the iPod, but the cell phone works well with my Cardo Rider bluetooth very well.


Cardo Rider bluetooth set:


Tuesday, January 15, 2008

Warmnsafe heated jacket power.

Warmnsafe makes electrically heated gear, including a heated jacket liner. I have one and it's great.

As far as its use, there has to be a power source and that source has to be controllable. Otherwise you'd eventually bake. That's why Warmnsafe also makes their "Heat-troller". It's a time based switch that turns the electricity on and off to adjust the amount of heat a person gets. You can read all about it on their site if you want.

Warmnsafe sells a Heat-troller that's designed to leave a dangly wire and plug somewhere on the bike. Yeah, a wire, with a plug on the end. Dangling. Maybe I could stash it under the seat when it wasn't in use.

I don't think that makes for a very clean installation. So this is what I did. 99% of the time this will be completely out of the way. When the jacket is in use, I simply attach an 18" cable between the socket and the jacket. The wire passes along the top of my left leg.


This pic shows the coax connector in the center of the pic. Visually, it's no worse than the factory body panel screw below it. Above it, you can see the knob for the Heat-troller.


This is the Heat-troller control knob and the coaxial connector below it.


As usual, you can click on these pics to make them larger.


Oh, by the way. Warmnsafe uses coaxial size N connectors and jacks. Sound like there's something common going on here?

Accessory outlets

I installed accessory outlets in the FJR recently. They consist of one SAE socket on the left, one standard 'cigarette lighter' socket on the right, and a coaxial size N above the second "T" in "THAT". Here's a pic. Click to make it larger.


You can see I've put these outlets on/in the rear fender. I know some of you are surprised/confused by the location. Tucked up tight and close, there are no obvious connections or wires visible under the fender. You'd have to hold your head upside down to find them.

The purpose of these outlets is to provide power while the bike is standing still. They'll power my air pump, a spotlight, a cell phone. Basically whatever is needed for an non-standard situation. Well, except for the size N coaxial connector. Its purpose is to allow me to plug in my trickle charger. It's the same product and use as in a previous topic.

Here's a pic of the trickle charger plugged into the coaxial connector.


See, I don't plug add-on accessories into the front of the bike. If I have an accessory, it's wired directly and left permanently installed. Personal choice. I have no need for generic outlets in the front fairing. I hate floppy cables and their potential for becoming entangled in the controls.

Ok, but what about the location? What about all the water and road splash and garbage that will collect under there? Well, I used lots of heat shrink tubing. I taped the wires as the factory might, and besides, what happens under the hood of a car during a pouring rain? Same dirt, same amount of water, same environment. So I don't worry about it. The products are engineered to resist the problem.

Yeah, I kinda left that part out of the equation.... See, the SAE on the left is an exterior grade RV unit with nylon screws. The 'cigarette' on the right is marine grade. The coax in the middle is chromed brass. I didn't use cheezy products for the interior dash of a 72 Ford.

Electrically, they're all wired to an independent 15 amp fused circuit (unswitched).

Here are my sources:

SAE. It's about 2/3 down the page.
Cig lighter and cig lighter. Same product at different prices?
Coax from Radio Shack.

Wednesday, January 2, 2008

Heated Grips

I recently installed DualStar handgrip heaters on my FJR. I used a Warmnsafe Heat-troller to regulate the grip temperature. Here are some details.

First, the DualStar grip heaters require you to remove your existing grips from the bike. This might be a good time to find a set of grips you like better than your stockers, and for the purpose of heating, a thinner (race) grip probably works best. I reused my stockers this time, but in the past, I've used 'gel' race grips with good results.

So, let's remove the grips and mount the heaters. Most manufacturers use a bit of rubber cement under the grips to secure them and keep them from rotating. To overcome this hurdle, I simply shove a long shaft thin gauge screwdriver between the grip and bar. Then I spin the screwdriver so that it migrates around the bar to peel the grip away. Finally, I spray some WD40 (or chain lube/whatever) between the grip and the bar where the screwdriver still is. A little spreading of the lube will allow the grip to slide off with a reasonable amount of effort. Be aware, YOU HAVE TO CLEAN THE LUBE OFF BEFORE PROCEEDING.

Ok, so now you've cleaned your bars of lube so the grip heaters can stick to the bars. The instructions included with the set are pretty obvious, but here are a couple of tips they don't seem to include.

First, locate the heater in a place that will heat your FINGERS, not your palms. This means to rotate the heaters so their centers face forward on the bike. They'll probably be even better if they're forward and slightly lower than the horizontal centerline of the bars. (Yeah, that might sound confusing, but sit on the bike, put your hands on the bars, and figure out where your actual fingers are gonna rest. Position your heaters so they stick in this area.)

Now, these heaters aren't huge. They don't cover the entire grip area, so they can also be placed anywhere between inboard and outboard of the grip. Where do you normally grip your grips? Out by the bar end weights, or inboard close to the finger controls? I do the latter, so I placed my grips under this area. Think ahead!

All right, now we've figured out where we wanna stick the heaters and we've stuck them there. It's pretty obvious how to do this. It's in the regular instructions.

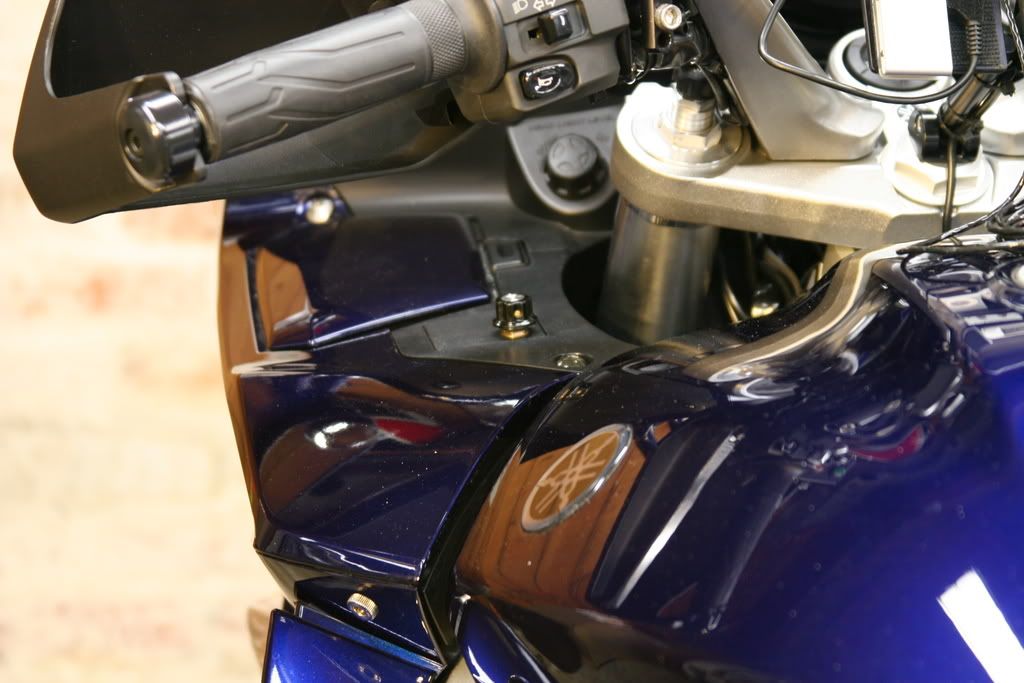
Route your wires where you need to. Remember, there needs to be a LOT of slack on the throttle side so the throttle can be twisted without pulling the heater wires. Take care with this because you don't want that wire to hang the throttle open or closed. Proper routing is imperative.

Put your grips back on over the heaters, using whichever technique you normally use.

Now, here's where it gets really interesting. DualStar makes a decent grip heater, but their electrical diagram leaves a bunch of stuff in question. There are three wires for the heater. They're RED, BLUE, and WHITE.

Apparently, the RED wire is their 'common' rail. This connects to both the HI and LO circuits. Their diagram shows RED connected to battery or frame ground. This works, but it's an odd choice of colors.

I connected both the HI and LOW circuits together so that they operate together and get the grips HOT in a shorter period of time. Any other configuration seems to fall short in my book. I like toasty digits.

Thus, the WHITE and BLUE wires are connected together. This makes both halves of the heaters work simultaneously.

What's the drawback? Not much to speak of. Using the heaters together draws a maximum (measured) current of slightly less than 4.5 amps at 12VDC. The normal HI setting draws 2.85A and the low setting draws 1.6A. Most modern bikes will easily handle a 4.5 amp draw, and if your bike isn't able to provide the 1.65A difference between HI and 'tandem', you need a new charging system. (1.65A at 12VDC is just shy of 20 watts. That's like an extra tail light. Not much extra load.)

Now onto the Warmnsafe Heat-troller. Connections are simple. RED and BLACK go to 'hot' and 'ground' just like a normal accessory. The other bare wires coming from the product are BLUE and WHITE. In this case, BLUE is switched power and WHITE is effectively 'ground' (even though I measured it at about 15.5 ohms off ground when not powered.)

Therefore, we'll take the RED wire from the heaters and connect it to the WHITE wire of the Heat-troller. Now we'll take the WHITE and BLUE wires of the heaters (yes, both) and connect them to the BLUE wire of the Heat-troller.

The effect? Both the high and low circuits of the heaters will now be controlled by the Heat-troller.

No, I haven't gone into complete installation of the Heat-troller control unit and electronics box. We're back again to planning and execution. Where and how it'll fit on your bike is your problem and it's based on your situation and desired application.

DualStar is located here. DualStar can get both the grips and the Heat-troller, but they don't keep them in stock so they're sorta slow at delivery. Their site is also a little difficult to navigate, so I've given you the shortcut to the heater page.

Warmnsafe is located here. Warmnsafe sells a complete kit with the controller and the heaters for $80. They seem pretty responsive. Here's the shortcut to their heater/controller page.

Use the comments sheet to ask questions and I'll try to include the answers by updating this article.